
The tenting sector becomes more and more popular each year. Overall market size rested at over 2$ billion in 2018 with a projected annual growth rate of 6.3% between 2019 and 2025. The rise in popularity of outdoor activities will continue to be a key driver for the market as a whole.
However, it’s worth noting that the popularity of tents may face short-term headwinds due to the pandemic. After all, no one can deny that COVID-19 has had a major impact on the travel industry across the globe.
Still, a best budget tent of quality is important since it can make or break the camping experience. Something portable, easy to set up, and cozy will undoubtedly add to the fun factor of camping rather than being more trouble than it’s worth.
In this article, we’ll take you through some of the top-rated options on the market and cover the main considerations so you can find the best tent under $200. After all, making a thoughtful buying decision is the key to getting a tent that’s suited to your specific needs.
Top 7 Best Tents Under 200: Comparison Chart
| Brand | Type | Capacity | Material | Season Rating | Floor Area | Weight |
| Wakeman | Dome | 2 person | 190T polyester | 3 | 4.75 x 6.4 ft | 2.75 pounds |
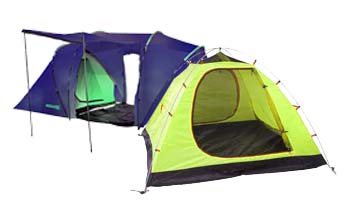
| OT QOMOTOP | Cabin | 6 person | 68D polyester | 3 | 10 x 9 ft | 18.92 pounds |
| Coleman | Dome | 2 person | 75D polyester | 3 | 5 x 7 ft | 7 pounds |
| CAMPROS | Cabin | 6 person | 185T polyester | 3 | 11 x 7 ft | 13.4 pounds |
| Core | Cabin | 6 person | 68D polyester | 2.5 season | n/a | 21.7 pounds |
| Pacific Pass | Dome | 4 person | 190T polyester | 3 | 9 x 7 ft | 8.35 pounds |
| MOON LENCE | Dome | 4 person | 190T polyester | 3 | 9.5 x 10 ft | 10.25 pounds |
Considerations Before Buying Camping Tent Under $200
Tent Size & Weight
The first thing that you’ll want to consider when choosing your tent under 200 is its size and weight. At first, you might think that getting a giant tent is the way to go since it’s spacious enough to accommodate multiple people not to mention a ton of gear.
But there are a few downsides to getting more space than you need. First of all, it’ll cost you more since it’s a bigger unit. Furthermore, it’s bound to be heavier which can present a serious challenge if your campsite is far away from your parking spot.
If you’re not sure how much room you need then the easiest way to figure it out is to get inside a tent and visualize all your gear next to you. Does it still feel big enough? Or is it too cramped/more spacious than needed?
Those who are shopping for a tent online can test out tents of a similar size at their local department store to get a feel for product scale. Always consider the average number of people you take with you on camping trips (if any) since that is a major factor in size selection. You can always check several tents under 200 reviews to make your choice and decide on your pick among some of the best family tents under 200.
Shape
The next thing to consider is the shape that is right for you. Dome tents are a popular choice since they give campers a lot more headroom than some of their counterparts. The main drawback of dome tents is their stability. The bigger a dome tent is, the less stable it becomes.
This makes it fine for solo campers but anyone who takes friends along with them on camping trips would likely find that an a-frame tent is more suited to their needs. If you’re dead set on the dome shape but want stability, try to find a geodesic tent.
There are other variants to consider like wedge, teepee, and tunnel tents but they’re similar enough in practice that a lot of it comes down to stylistic preference rather than any objective analysis.
Materials
There’s nothing wrong with buying cheap camping tents but you should always make sure that the materials are of high quality. You don’t want the tent to fall apart after the first couple of uses, are you? Remember that it’s possible to balance price and durability since the two aren’t mutually exclusive.
Cotton is a prime pick for camping in hot and humid climates since it has good ventilation under warm conditions and is less susceptible to condensation in comparison to other materials. While browsing through some “Best tents under 200 reviews” we’ve learned that some campers are more concerned about rain than high temperatures. Is that the case for you too?
Then if you tend to camp in wet environments a waterproof tent is a must-have. That way you don’t have to worry about leaks whenever the weather takes a turn for the worst. Nylon, polyester, and cuben are three popular choices in the hydrophobic material department.
Season Rating
- One-season tents are the most breathable type since they’re designed to be used in warm regions. The downside is that they won’t offer much protection during rainfall.
- Two-season tents can withstand some light rain and wind but nothing too intense.
- Three-season tents are the best choice for the average camper since it’s able to endure moderate rain and wind. It can even stand up to very light snow.
- If you go camping in the winter then you’ll need a four-season tent. These are expedition tents, made for extreme weather conditions. However, this is a bit overkill for most people. Not to mention – these are not cheap camping tents. They’re on a higher end of the pricing spectrum due to the premium manufacturing that is needed to withstand such arduous environmental challenges.
Ventilation, Windows, and Doors
As we mentioned above, choosing a breathable material like cotton will help with ventilation. Tents that have two doors provide flow-through ventilation which eases the effects of humidity by providing a natural fan when you need it most.
Vestibule doors are ideal for campers who want a combination of good airflow and robust rain resistance since you can roll the vestibule back when the sun is down but quickly drop it down again if a storm comes around.
Other smaller features like mesh canopies can also make the interior feel less like an oven even under intense sunlight. Avoid tents with doors that are too small to let enough air in since that will be the biggest hindrance to ventilation.
Setup Time
Getting the best budget tent is smart because it’s easier on the wallet. However, those financial savings will stop being worth it if the process of setting it up ruins the trip altogether. Low-quality tents are notorious for taking a long setup time.
Much like choosing tent sizes, the easiest way to figure out how easy to set up a backpacking tent would be to find the same model you’re looking at online, in a brick-and-mortar store. And rather than letting the sales representative assemble it – try the setup for yourself.
It’ll be a lot easier to gauge the ease of assembly if you handle things yourself instead of leaving it to a rep that has done it a dozen times before and thus makes the setup look easier than it truly is.
Extra Features
There’s a common misconception that you need to spend a fortune on a tent just to get a few neat bells and whistles. This couldn’t be farther from the truth – tent under $200 have extra features that are just as useful as the ones you’d see in premium offerings.
Tents that come with aluminum poles are a worthwhile feature to look for these are more durable than options that rely on fiberglass. Folded seams and double stitching can deter leaks (though you should still use a seam sealer to be safe.)
If you’re worried about mosquitoes then looking for tents with noseeum meshing as a feature would be wise since it’s incredibly effective at keeping bugs out. There are plenty of options for such tents under 200, so finding one won’t be an issue.
Finally, find a tent with a large rain fly since it’ll serve as the umbrella of your tent.
How to Make Your Budget Tent Last Longer
Even the best backpacking tent under 200 needs proper care in order to serve you long and well. :
- Never store a tent while it’s wet: If you store a tent before drying it off, then its fabrics and even the coatings can break down prematurely.
- Setup with caution: Don’t haphazardly bang the ends of the poles together unless you want to reduce their overall strength, have permanent deformation, or even breakage.
- Gentle zipping: Whether it’s your pants or your tent, the last thing you want to do is zip too fast. That will lead to breaking something in both cases.
- Limit UV exposure: We get it, shielding from the sun is kind of the point. That said, you shouldn’t leave your tent to bake in the backyard all summer or the fabric will go brittle.
- Footprints: Unlike with carbon, it’s okay to leave a footprint for tents. They protect your tent from dirt and water so you don’t have to scrape mud off after each use.
Remember: affordable tents can last just as long as expensive alternatives if you take care of them properly. So keep these little tips in mind if you don’t want to often spend money.
Conclusion
And that’s about it! We conducted thorough research to bring you this review on the best tent under $200 in 2023. So, hope this guide was informative and has made the buying decision easier for you.
It’s worth noting that tents are only bound to get better in the coming years and decades due to the advancements in technology. There are always new materials in the works just waiting to hit the market.
In fact, despite being around for over 40,000 years, the design continues to evolve to this very day — almost like a species of its own with a genealogy dating back millennia.
It’s time to go out there and buy your piece of history!